
The Member Management Appointments page is designed with similar functionality to the Configurations Appointments page, with the main difference being a streamlined view for the specific member you selected. This includes viewing upcoming and past appointments for the member, as well as adding new appointments for them.
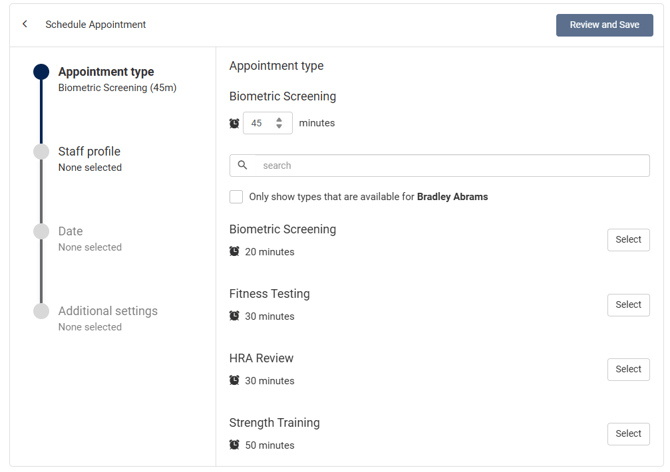
To start setting up a new appointment for your selected member, click Add Appointment. This will bring you to the first screen of the setup where you select the appointment type. By default you are shown only the appointment types available to the member. You can unselect Only show types that are available to (member) to select from any active appointment type, whether or not it is available to that member's population.

When you select an appointment type, the default duration is inherited from the Appointment Type settings. You are able to override this field to shorten or extend the appointment duration.
Once an appointment type is selected, you can proceed to the Staff profile page by clicking it on the left side of the screen. The list of staff profiles that have schedules associated with the selected appointment type are displayed (even if they are not configured at the selected member's Location). You can override this list to show all available staff regardless of schedule availability by unchecking Only show staff profiles with a schedule created.
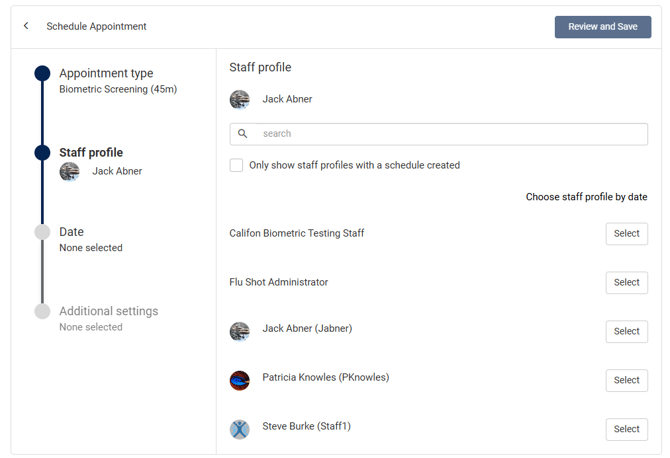
You can also select Choose staff profile by date to select a date/time first, then select from available staff during that time instead of selecting the staff first.
Once you have made a selection, you can move on to the Date screen by clicking it in the left menu.
If you selected a specific staff profile, dates and times matching only their availability for this appointment type are displayed. You only need to pick a date and time.
You can also override the staff's availability to and set any start time (once a date is selected) by unchecking Only show dates that are available for the selected appointment type and staff member.
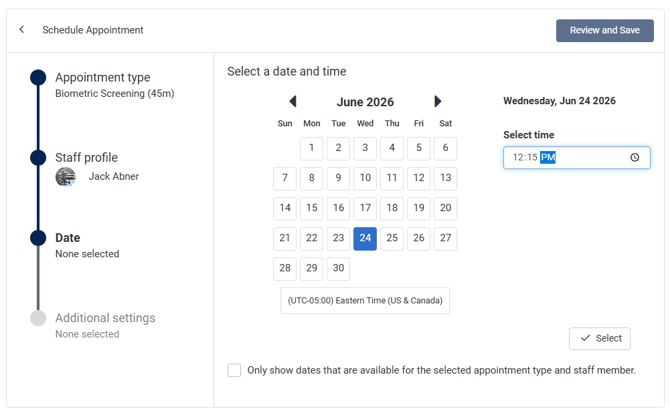
If you opted to select a date/time first, then select a staff, you start by selecting the date. All available slots for any available staff are offered, and once you select a slot you can pick from any staff that are available during that time.
 Once the staff, date, and time have been picked, click Select to add the appointment. This does not save the appointment yet.
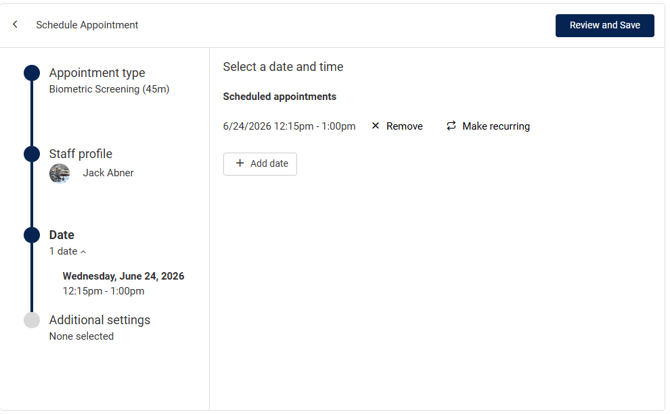
You can add additional appointment slots for this same Appointment Type by clicking Add date. If you selected a specific staff member, you will schedule another date/time with that same staff. If you used the Choose staff profile by date option, you can schedule with the same staff or a different staff depending on the date/time you select next.
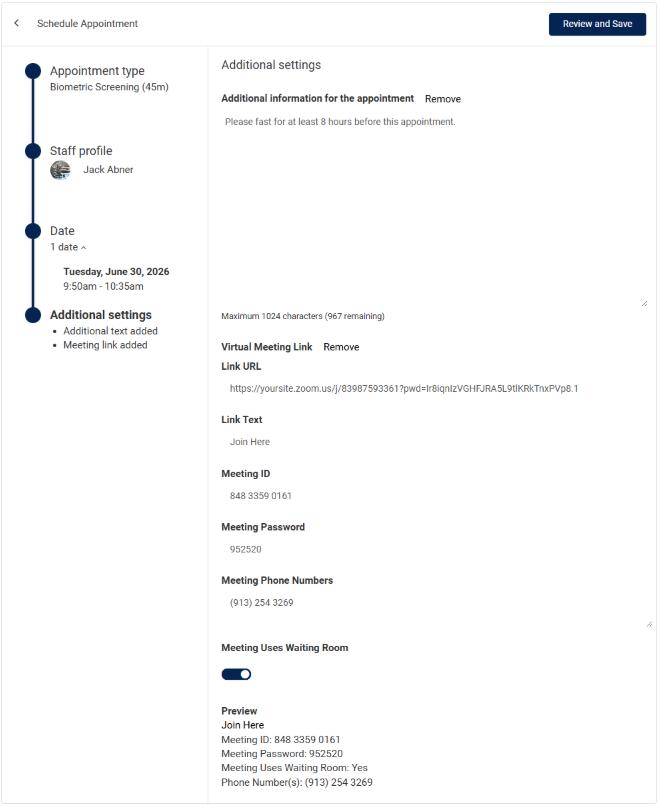
You can select Review and Save once at least one appointment has been added. The Additional settings screen is optional and allows you to add Additional Information Text to include any other information that may be useful to the member/staff.
You can also add a Virtual Meeting Link to include an online meeting link and related details.
Once you click Review and Save, you will see a summary of the details you selected for the appointment(s) before confirming the appointments. An email confirmation will be sent to the member and the appointment staff by default unless Send email confirmation on save is unselected.
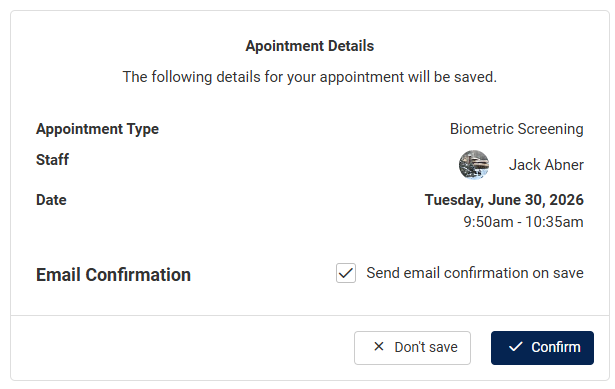
Clicking Confirm will save the appointment and add it to the participant's schedule and send email invites to the member and the staff (if configured).